Week 4: Handles + Pockets + Zippers
|
If you missed this week's Instagram Live, we had a little issue with the connection so I had to stop the video and start it again so you can watch them in 2 parts.

Handles:
Decorative Webbing:
If you’re using decorative webbing, you can skip all the covering instructions—yay for saving time! 🙌
To keep the ends from fraying, I like to carefully melt the edges with a cigarette lighter. Just a quick pass to seal them does the trick! 🔥
If you'd rather tuck the edges under (like for the handles), here's a tip:
Cut your handle piece 1" longer than needed. That gives you ½" on each end to fold under and stitch down for a clean, finished look.
Polypro Webbing:
When covering your polypro webbing, make sure to use a tube turner to turn your fabric tube right side out—this makes the process so much easier! 🙌
(If you need a refresher, check out the demo in this week’s live!)
I also used the Clover Clip and Glide Bodkin to pull the polypro webbing through the fabric tube—it worked like a charm! 🧵✨ Definitely one of my favorite little tools for this step.

Pockets
When working on your inner pockets, don’t forget to add interfacing and topstitch the top folded edge. This not only gives your pocket a clean finish, but also helps keep that interfacing secure in case it ever starts to separate.
(Did you catch that moment on the live when I added a sew-in label to the inside pocket? I’m seriously obsessed—it turned out SO cute!)

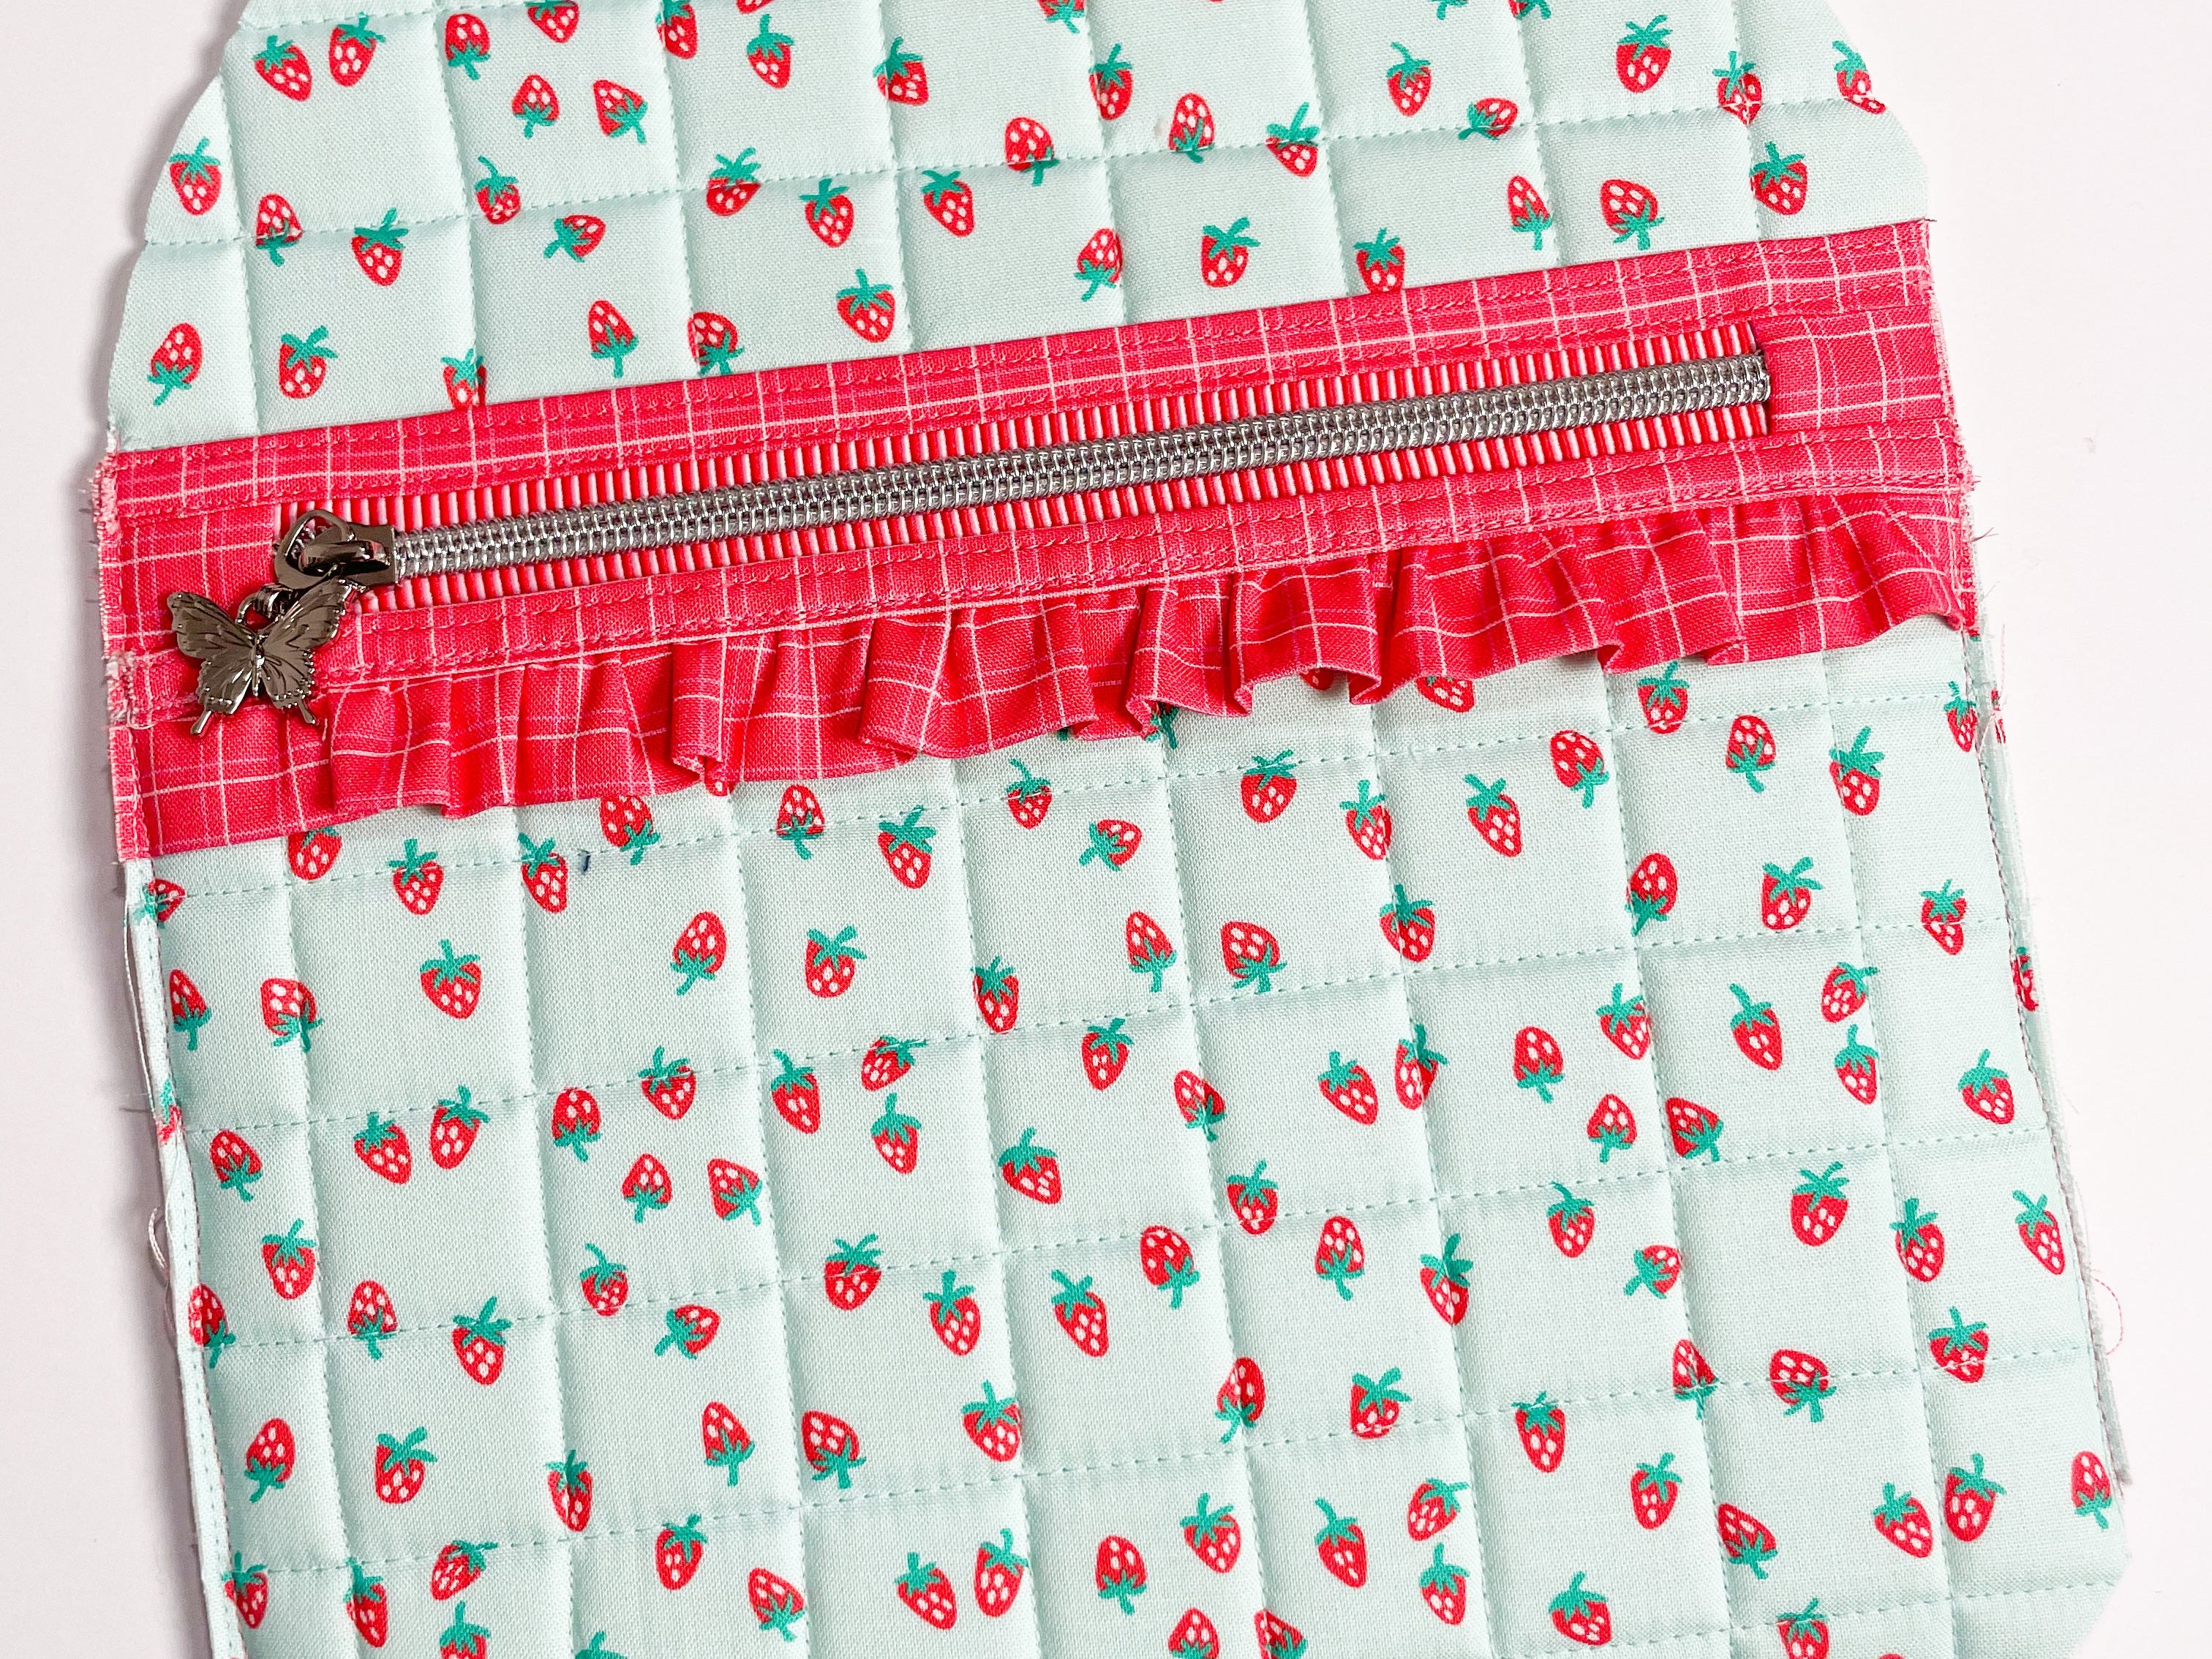
FRONT ZIPPER POCKET + RUFFLE DETAIL:
I decided to add a ruffle to the Front Zipper Pocket, and I’m completely in love with how it turned out! 😍
Here’s how I did it:
- For the Violet Backpack: Cut a strip 2" x 14"
- For the Archie Backpack: Cut a strip 2" x 20"
How to make the ruffle:
- Fold the ruffle strip in half lengthwise and press.
- Sew a basting stitch along the raw edges.
- Gently pull one of the basting threads to gather the fabric until it matches the top edge of the Front Zipper Pocket.
- Be sure to stitch down the raw side edges of the ruffle to secure them before final assembly.
- Bind the top edge of the pocket, then go ahead and add the zipper.


Gusset Zipper:
Sharing a few helpful photos of the zipper installation process today, but here’s a quick breakdown of the steps too:
Step 1:
Sew a ¼" seam along the edge of the zipper strip and the zipper.

Step 2:
Fold the zipper open, then press the zipper tape flat against the lining side of the zipper strip.

Step 3:
Stitch right along the edge of the zipper tape to enclose the raw edges. This step also creates a clean topstitch on the exterior side of the zipper strip.
👉 Tip: Make sure to match your bobbin thread to your exterior fabric so that topstitching looks polished from the outside!

|
|
|


Lots of labels in the Knot and Thread shop. Check them out here.
Remember to check out other sewists' bags on the hashtag #BackpackBackpackSewAlong2025!
|
|
Comments (0)
Back to Blog