Week 5: Backpack Assembly
|
|
|

|


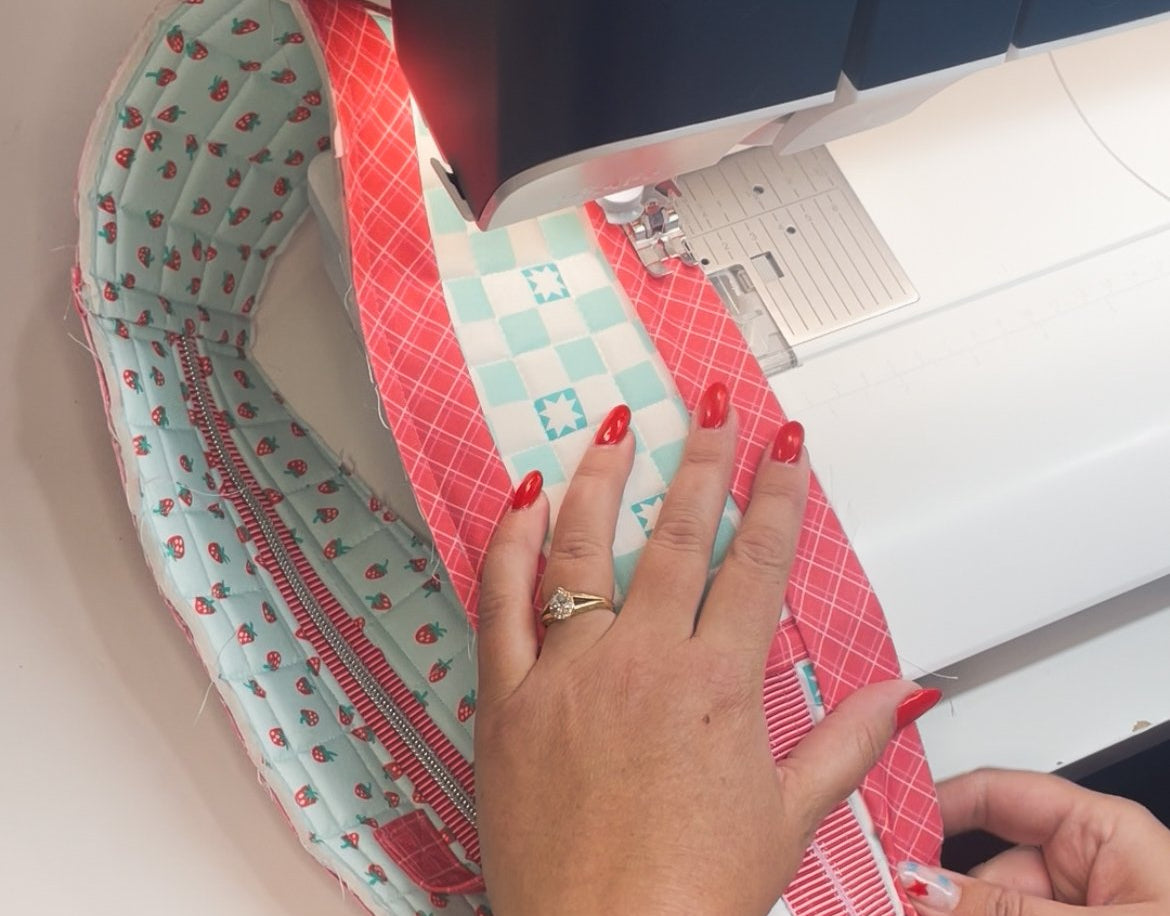
Bias Binding straight from the pattern:
I've learned a lot over the years of making bags and writing patterns, and while the binding method in the pattern works just fine, I’ve since found a different method that I love even more—and I want to share it with you!
Check out this YouTube video I made of the original binding method here.
Sharing an Alternative Bias Binding Method:
This is a newer-to-me method that has been really exciting to try out on this and other bags!
I attached the bias binding to the lining side of the gusset using a 1/4" seam allowance, and I’ve found a few reasons I really like it:
-
It’s less of a 3D object compared to sewing the binding onto the full backpack—so it’s flatter and easier to manage.
-
Having that 1/4" stitching line already in place when attaching the backpack front and back has helped me keep my seam allowance consistent.
-
It makes the final step of rolling the binding over and finishing it feel much more controlled and polished.
Overall, I’d say it’s a winning technique! 🙌

Attaching Hardware:I’ve got a video for you to walk through attaching your hardware—you're in luck! 🎉 I also did a quick demo of it on this week’s live, so be sure to check that out too. Easy breezy! 🙌✨ Watch the video here. |

Archie Backpack Update:
I finally got my fussy cut pocket made for my Archie Backpack, and I’m so happy with how it’s turning out!
Part of why I wanted to have a week with @fabricpop in this sew-along was to help me get out of my own way—haha. I sometimes struggle to make time for something new because I doubt my abilities, worry about the time commitment, or just don’t want to deal with the mess it might make.
But all of that was worth it for this patchwork fussy cut pocket!!
Thanks, Christina, for the tips and for challenging me to try a new skill! 💪🧵✨ I am SO excited to get my backpacks all finished this week!


Remember to check out other sewists' bags on the hashtag #BackpackBackpackSewAlong2025!
THANK YOU SO MUCH for sewing along with us! It's been a blast.
|
Jacquelyn on May 01, 2026
Absolutely love this pattern. I have made 4 backpacks already! One question – do you have any tips for how to sew through the bulk at the bottom of the backpack near the small hardware attachments. I consistently break multiple needles. Even tried switching to needles for leather but still breaking.